Trezor.io/start: The Complete Guide to Securing Your Cryptocurrency
Introduction: Why Trezor Is the Smart Choice for Crypto Security
Cryptocurrencies provide financial freedom, but they also come with the responsibility of keeping your digital assets safe. Online wallets and exchanges can be vulnerable to hacks, phishing attacks, and malware.
Trezor provides a hardware wallet solution that stores your private keys offline, giving you full control and protection over your crypto assets. This guide will walk you through everything you need to get started with Trezor, from setup to managing and securing your digital funds.
Step 1: Choosing the Right Trezor Device
Trezor offers two main models:
Trezor One – Affordable, simple, and beginner-friendly. Supports most popular cryptocurrencies.
Trezor Model T – Premium model with touchscreen, support for more coins, and advanced features like Shamir Backup for added security.
Choose your device based on your crypto portfolio size, the coins you plan to store, and whether you want advanced backup options for long-term security.
Step 2: Unboxing Your Trezor
When your Trezor arrives:
Inspect tamper-evident seals to ensure the device has not been compromised.
Check for physical damage.
Ensure all accessories are included, such as the USB cable and recovery card.
Pro Tip: Always buy Trezor from official channels to avoid counterfeit products.
Step 3: Connecting Your Device and Accessing Trezor.io/start
Connect your Trezor device to your computer using the USB cable.
Visit Trezor.io/start.
Download and install Trezor Suite, the official software for managing your wallet.
Trezor Suite Features:
Send and receive cryptocurrencies securely
Manage multiple accounts
Track your portfolio
Update firmware safely
Step 4: Creating or Recovering a Wallet
During setup, you will have two options:
Create a New Wallet – Generates a new recovery seed giving you full ownership of your crypto.
Recover an Existing Wallet – Enter your 12, 18, or 24-word recovery phrase to restore your wallet.
Security Tip: Write your recovery seed on the provided card and store it offline. Never store it digitally or share it with anyone.
Step 5: Setting a PIN Code
A PIN code provides an extra layer of security:
Required every time you connect your device.
Choose a unique, memorable combination. Avoid predictable sequences like
1234.
This ensures your funds remain safe even if the device is lost or stolen.
Step 6: Updating Firmware
Firmware updates are essential for maintaining security:
Open Trezor Suite to check for updates.
Follow the instructions carefully to complete the update.
Only use official Trezor software for updates.
Regular updates protect your wallet from vulnerabilities and ensure optimal device performance.
Step 7: Receiving Cryptocurrency
To receive crypto:
Open Trezor Suite and select your cryptocurrency account.
Click Receive to generate a wallet address.
Share this address with the sender.
Important: Always verify the address on your Trezor device screen to prevent malware from altering it.
Step 8: Sending Cryptocurrency
To send crypto safely:
Open Trezor Suite and select the account.
Click Send, enter the recipient’s address and amount.
Verify all transaction details on the Trezor device.
Approve the transaction to send funds securely.
Confirming transactions on the device prevents errors and fraud.
Step 9: Using Trezor with Third-Party Wallets
Trezor integrates with trusted third-party wallets to extend functionality:
Electrum – Advanced Bitcoin management
MetaMask – Ethereum and DeFi access
MyEtherWallet – Ethereum and ERC-20 tokens
Always use official wallets when connecting your Trezor for maximum security.
Step 10: Backup and Recovery
Your recovery seed is the most important security feature of your wallet:
Store it offline in a secure, fireproof location.
Model T users can use Shamir Backup to split the seed for extra security.
Recovery allows restoration of your funds if your device is lost, stolen, or damaged.
Tip: Never photograph or store your seed digitally.
Step 11: Advanced Security Practices
For maximum protection:
Update firmware regularly
Avoid public Wi-Fi when managing crypto
Never share your PIN or recovery seed
Consider using a second Trezor for multi-signature wallets
Following these practices ensures your crypto assets remain safe from online threats.
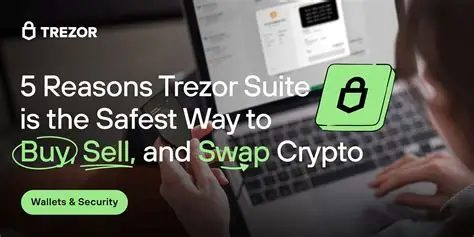
Step 12: Exploring Trezor Suite Features
Trezor Suite provides:
Portfolio Management – Track all holdings in one interface.
Exchange Integration – Swap cryptocurrencies directly.
Transaction History – Monitor and export records securely.
Privacy Options – Manage accounts without exposing your seed phrase.
Trezor Suite offers a seamless and secure experience for beginners and advanced users alike.
Step 13: Frequently Asked Questions
Which cryptocurrencies are supported?
Trezor supports hundreds of coins, including Bitcoin, Ethereum, and ERC-20 tokens.What if my device is lost or stolen?
Use your recovery seed to restore your wallet on a new device.Can firmware updates be applied offline?
No, updates must be downloaded and verified through Trezor Suite.Is Trezor beginner-friendly?
Yes, Trezor and Trezor Suite are designed to be intuitive while providing high-level security.
Conclusion: Start Your Crypto Journey with Confidence
Trezor provides unmatched security for cryptocurrency, giving you full control over your digital assets. By following this guide from Trezor.io/start, you can safely set up your device, manage your crypto efficiently, and protect your investments from online threats.
Start your crypto journey today and enjoy peace of mind, knowing your digital assets are secure, private, and fully under your control.